Last updated on November 28th, 2018 at 02:32 pm
You may have heard people in the WordPress community talk about different types of WordPress plugins that can help you achieve something with your website. You may have asked yourself, “what is a WordPress plugin?”

What Is A WordPress Plugin?
Well in short, it is script that was written by someone who understands PHP (a programming language) that helps extend the functionality or adds new features to your WordPress websites.
Related articles to help you with Your WordPress Blog:
- Social Warfare Plugin Why I Use It, Setup and Customization Tips
- 7 of My Favorite WordPress Plugins and Why
- Affiliate Marketing Tips That Will Increase The Conversions On Your Blog
I know that might not make much sense, but the truth is that you really don’t need to know how or what a plugin is to start using one with your WordPress blog.
[clickToTweet tweet=”Learn to manage your blog, skills to make money. #WordPress #freetraining at susanvelez.com ” quote=”Learn to manage your blog, skills to make money. #WordPress #freetraining at susanvelez.com ” theme=”style4″]
All you need to know is that there is probably a plugin for almost any type of functionality that you want to add to your website or blog. If NOT then you could hire a PHP programmer to create one for you. (just be prepared to pay a pretty penny…It’s not going to be cheap)
What Are Some of the Most Popular Plugins?
People’s opinions will vary because everyone uses different plugins for their websites. However, some of the most widely used plugins at the time of this writing are:
Yoast SEO: This plugin has had over one million downloads and it is the same plugin that I use to implement Search Engine Optimization on my WordPress blog.
Contact Form 7: This plugin enables you to add contact forms to your blog quickly just by adding short code to your post or page.
Social Media Widget: A plugin that was created by Noah Kagan has been downloaded over 200,000 times. I use the Social Warfare for my social icons.
Never use a plugin on your website just because other people are using it. Over time you will learn which ones help you accomplish what you want to do.
How Many WordPress Plugins Should You Install on Your Site?
People’s opinions will vary on this. Most people who use WordPress will say “The more plugins you use, the slower your website becomes.” It’s your website and only you can determine which plugins you want to use, here’s an article that will explain which ones you should consider using when starting your site.
The main reason that a plugin will slow down your website is because it was poorly coded. So answering your question “how many WordPress plugins should you install on your site” install and use only the ones you need.
Avoid listening to all the hype about this new plugin or that plugin. If you don’t need it, don’t install it.
I know this is a vague answer, but as I mentioned it’s your site therefore, it all comes down to what type of plugins you want to use. Here’s another great article on plugins and WordPress speed performance.
Finding Popular Plugins to Use?
When you set up your blog and start looking for plugins, you will want to browse to the free WordPress plugins directory. Once there you will be bombarded with a ton of plugins that you can start using on your site.
It won’t be hard to find a plugin help you accomplish what you want done…as long as you know what you want to do. A word of caution, don’t spend too much time there because no matter what you do to your blog, if you don’t have visitors no one will ever see your site.
Your main focus is to get your WordPress blog up and running and start providing valuable content.
Plugins vs Widgets
Many first time WordPress users will become confused when it comes to a plugin vs a widget.
So let me break it down.
Both will give your website added functionality, but they are completely different.
Widgets are automatically encoded into WordPress. These widgets allow you to embed specific things into your sidebar and footer.
Many people use these widgets to display banners, fancy email optin forms, calendars, events, buttons and etc…
Note: Widgets can be placed in any widgetized area of your website. (how many widgets or the placement of them will be determined by the WordPress theme you are using)
So if you want to use the built in function of your theme to display something specific, like a banner or recent posts, you will most likely use a widget.
How to Find the WordPress Widgets
Follow along and lets get started using the WordPress widgets in the back office. I will also show you how it will look on your blog, depending on which widget your activate. Then we will see what types of widgets you will have available should you decide to use some of the free pre-installed WordPress themes.
1. Login to your Website dashboard
Scroll down till you see appearance and then click on widgets. This will take you to the widgets section of your websites.

2. WordPress Available Widgets
Depending on the WordPress theme you are using, you will, you will see the ones that are available to you. The image below shows the available widgets on my site. I am currently using the Genesis Framework for my site.

3. How The Primary Sidebar Widget Looks Like
You will notice that the widget will tell you exactly where your content will display. So if I added something to the primary sidebar widget, my content would show up on the right side of my content like this. Many people use this widget to place banners, email optins and etc…

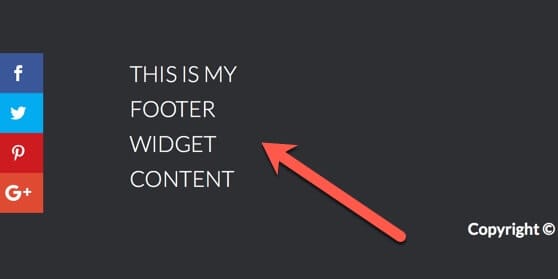
4. This is the Footer Widget Activated
This is how it will look like when I add it to the footer widget. Many clients like to add logos, contact information, and links to other pages like privacy, disclaimers.
5. The After Posts Entry on the Genesis Theme
If you wanted to add content after your post entries, the Genesis Framework makes it easy by using the after entry widget. You can add things to the end of your Posts entries.


I use this to add an affiliate disclaimer to all my blog posts. This makes it quick and easy to ensure that it is added automatically whenever I publish new blog post. This works out great if you want to add it to every post you publish, this way you won’t have to keep adding it, every time you publish a new post.
6. A Look at the Twenty Sixteen Available Widgets
Here is what your WordPress widgets will look like if you are using the free Twenty Sixteen theme that comes activated with every WordPress installation.

7. Twenty Fifteen Available WordPress Widgets
This is what your widget area will look like when you use the Twenty Fifteen theme. As you can see, you don’t get many options when it comes to the widgets area on the website.

Both the Twenty Sixteen and the Twenty Fifteen theme less available widgets than the Genesis Framework. However, all the widgets work the same. You can easily add blocks of content or HTMLcode inside of your widgets to get to show up where you want it to.
You may have to play around with your theme to get a feel of where the widget content is showing up on your blog. Based on the images above, you can see that free themes are limited to fewer available widgets.
How to Find, Install and Configure Plugins
In this section, we are going to cover how to find plugins so you can start using them on your WordPress blog. Once you find a plugin you need to know how to install and begin configuring it so it will work.
Let’s find that first plugin you can install.
LOCATE PLUGINS IN YOUR DASHBOARD
Scroll down on your dashboard till you get to plugins >> add new plugin

Search for A Plugin You Want To Install
If you know what type of plugin you’re looking for you can enter your keyword. Say for instance, you’re looking for a social media plugin. In the search here box enter the keyword “social media” without the quotes and you will pull up all the social media plugins available.

What If You Don’t Know Which Plugins to Start With?
Spend some time browsing the:
- featured
- popular
- recommended
- favorites
Once you have found the plugin you want to use. I recommend reading the reviews and finding out whether it is compatible with your version of WordPress.

Click on “Install Now”
Once installed, don’t forget to activate it!
Uploading Plugins
If you need to upload a plugin that you purchased or downloaded outside of your website, you will need to upload the plugin .zip file.
Go to plugins >> add new

Choose upload plugin and browse to the directory on your computer for the .zip file via the install now button.
Once the plugin is installed, click on “activate” right below the plugin.
Configuring Plugins
To configure the new plugin, you will go the plugin and click on settings this can be found right below the plugin. Or you will see the plugin on the left side of your dashboard and you can change the settings through there.
Every plugin is going to have their own settings and configurations. So it’s best to visit the plugin website and find out how to configure it properly.
Watch this video as I log In and install, delete and update a plugin from inside of my WordPress dashboard
Deleting a Plugin
There will be instances when you upload a plugin and you no longer want to use it anymore. Deleting a plugin is just as easy if not easier than installing a plugin.
Go to Installed Plugins
Go to your plugins tab and you will see “installed plugins” click on it and you will be taken to all your active and inactive plugins on your WordPress blog.

Locate the Plugin You Want to Delete
If it is a live active plugin, you will need to deactivate it before you can delete it. Click on deactivate and then you will have the option to delete it from your WordPress website.

Delete Plugin
Click on the delete button and you will be prompted of whether or not you actually want to delete it. Click OK.
It may take some time to actually delete the plugin, depending on how many files it has. Give it some time and you will know when it has successfully been deleted when you see this.

We all know that WordPress gets updated on a regular basis. At the time of this writing, I am using version 4.6.1. Plugins that are kept up-to-date by the developers are constantly being updated as well.
Always delete any plugins that you are not using.
Removing Extra Files Added by WordPress Plugin
While most of the plugins that you use on your WordPress website will be able to be deleted from the WordPress dashboard. However, many backup plugins, sliders and gallery plugins will require an extra step or two to completely delete it.
Some plugins will store files outside of the plugins folder. When you delete the plugin through the dashboard, the folder will not be removed completely. Here is a snapshot of what I am talking about.

You can check and delete the files that are left behind by using an FTP client of your choice. Before you delete any folders via FTP, always ensure you have a backup of your WordPress website. To locate the files, go to /wp-content/folder.
Cleaning up Your WordPress Database
If you don’t feel comfortable messing with your database, you can skip this step. Some plugins have been known to create their own WordPress database. If the tables have a lot of data, it takes up more space on your server and increases the size of your site.
You can easily and quickly delete the excess tables via phpMyadmin. A quick word of warning, if you don’t know what you are doing or feel comfortable messing with your WordPress database, be sure you stop and make a back up your website right now.
Go to phpMyadmin in your cPanel
login in and scroll down until you see your phpMyadmin icon.

Choose the WordPress Tables You Want to Drop
Select the tables that contain the plugin database tables you want to delete. You’re not really dropping the WordPress tables here.

Confirm You Actually Want to Drop the Tables
Confirm that you really want to drop the tables. Once you click on “yes” it will drop those tables. The only way you can restore them is if you have a backup of your WordPress blog.

If you are managing your own self-hosted WordPress blog, then you need to know how to keep your plugins updated. Most of my clients have no clue how to update their plugins. Many WordPress blogs are exploited and can be injected with malware if you are running the current version of the software and plugins.
Updating a Plugin
If you have an outdated plugin, you can easily see it from the inside of your WordPress dashboard. Here is a screenshot of what you will see.
Related: What Is A WordPress Plugin

Go to Your Plugin Dashboard
Remember how we just walked through of deleting a plugin. Well this time we are going to be updating one. So head on over to your installed plugins dashboard.
Related: Navigating the WordPress Dashboard

You will see which plugin or plugins need to be updated. If you are new to updating a plugin or are not sure if it may cause you some issues, now might be a good time to make a backup of your WordPress blog…just in case.
Click update and it will update the plugin and once it has been updated successfully, you will see.

Now you know how to update, delete, install and configure a plugin. What about uploading a plugin outside of your WordPress dashboard?
Uploading a Plugin via SFTP/FTP
You can install a plugin to your server via FTP/SFTP. If you have a plugin that you purchased or downloaded online, you will want to follow these steps to install via this method.
Open up your FTP client and access your hosting account server.
Access the public_html folder of your website.
Now scroll down till you see the wp-contents >> plugins
Double click on the plugins folder and you will see all the plugins that are currently installed on your website.
It will look something like this.

The plugins you have installed on your WordPress site will look different than mine.
Why Use FTP to Install A WordPress Plugin
You don’t have to and most of the time I will upload mine through the back of my WordPress dashboard. However, some instances you will run into an issue when the plugin takes too long or your hosting account will not allow you to upload it due to the size. I haven’t experienced this with my hosting account.
Bonus Plugin Tip
I’m going to show you something, I didn’t know before I started working with clients. It encountered my first plugin error and I freaked out because I had no clue how to fix it. So I quickly turned to Google and finally learned how to deal with a plugin error that a client had been received on their site.
For this demonstration purpose, I deleted a file from my backup plugin and this is what happened.
Dealing With PHP Plugin Errors

If you saw this you may not know what to do, but I am going to walk you through the process of how to fix this.
If you look at the PHP Warning you will notice that it tells you exactly where the issue is so you can fix it.
Let’s break down what this PHP Warning is telling us. If you don’t want to deal with these types of issues, you can invest in Managed hosting for your site, this way you won’t have to worry about anything excepting adding content to your WordPress blog.
How to Get Rid Of PHP Plugin Errors
Okay follow these steps to clear the error:
- The error is coming from the public_html folder
- Go to the wp-content folder
- You can see that it is in the plugins folder
- Now it tells us that the plugin that is causing this issue is the Backup Buddy plugin
- Finely it is the pluginbuddy folder and the _pluginbuddy.php file failed to open.
The issue that caused this problem was that I deleted the pluginbuddy folder from the server.
Quick WordPress Plugin Error Fix
To get your website back online quickly just rename the plugin folder till you figure out what is causing the issue. You can see from the screenshot below all I did was add rename at the end.

How do I rename a plugin?
Just highlight the plugin that is causing you issues and then left click or right click and then rename it. Once you do this the site function like normal.
Of course if this sounds too confusing, the easiest thing you can do is delete the plugin altogether. This is the quickest way to get your website back up and running.
Premium/Paid Plugins Versus Free Plugins
As a WordPress user, you will have the option to pay for plugin or use free plugins. It will be up to you to determine which route you want to go.
If money is tight, then I recommend starting out with the free plugins and then investing in your business as you start to make money.
What to look for when you start buying plugins.
- Is it a one-time cost?
- Does the plugin have an ongoing/subscription cost?
- How many websites can it be installed on?
Paying for a plugin is never a bad thing. Remember when you pay for a plugin, you are paying for the:
- Functionality
- Advanced Options
- Updates and Support
I know what you’re thinking. Why pay for a plugin when there are thousands of free plugins in the WordPress repository?
The downside with free plugins is, they will have limited functionality and styles. (If you want to unlock more functionality, you will have to pay)
Free plugins may have a tendency to not be updated on a regular basis, which can lead to your site being vulnerable online.
Premium plugins have more advanced options, which allow you to edit fonts, colors and placement on site and more.
How to Choose the Best Plugin
Unfortunately, there is no “best” plugin. Sure many plugin developers will want you to believe that their plugin is the best. Before you follow the crowd and try to be one of the cool kids. Ask yourself, what do I need to accomplish?
Will this plugin make my life easier? Can I afford it? If so then use it on your website.
As I mentioned in the video above, choosing a plugin will vary depending on:
- Cost
- Rating (don’t always rely on this)
- Functionalities (does it do what I need it to do?)
- Customer support (you really can’t expect a lot of support from a free plugin)
- When was it last updated?
When you are first getting a website online, the last thing you want to do is pull your hair out because of WordPress plugin errors.
Some of my clients love and use managed GoDaddy hosting because they don’t ever have to worry about these types of issues. While I am not a fan of GoDaddy, they swear up and down they love them.
Another great hosting account is WP Engine. They are great and I use them with one of my client’s websites. They have great customer support and you won’t have to worry about anything when you host with them. Yes they even have nightly backups which make it easy to restore your website if anything ever happens.
Managed hosting accounts are a little pricier than other hosting accounts like SiteGround. However, if you’ve never had a WordPress website and are scared of digging into it to learn about it, I would highly recommend investing in one.
The Take Away…
You don’t need to know “what is a plugin.” If you follow along with with this plugin tutorial, you now know how to install, delete and configure your own plugins.
Hand Picked Articles for You:
- Moving WordPress From One Host to Another
- How to Update The Genesis Framework Without Issues
- Does WordPress Automatically Backup My Content
Need some more WordPress basic tips?
Just ask…I can’t promise you that I will know the answer, but I don’t mind helping if I can. What plugins issues have you faced when you started your WordPress blog?

Susan, thanks for the post! Finding the right plugins as a new blogger can be overwhelming. I see things on other blogs and think – how’d they do that? Your post really helps. Steve
Hi Steve,
Glad you enjoyed the blog post and it helped you find the right plugins for your blog. It does take a while to find which plugins actually work best for your blog.
Thanks for taking the time to stop by and comment.
Have a great day 🙂
Susan